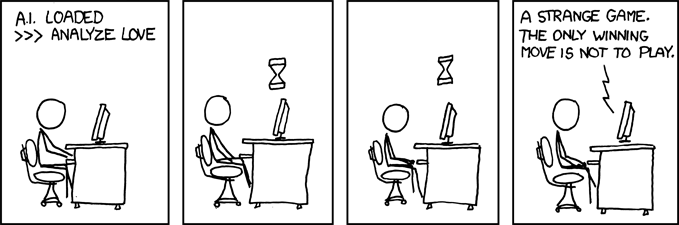
Game Theory
Reply


“I like red cape.”
Doctor Strange by Scott Derrickson. It was cool, a no brainer for an easy evening! Although not exactly what we initially planned to see but you’ll probably know more about that in our next installment. Now if I had the power to refill beer indefinitely, I’d totally over abuse that! Beside that I’d also point out that the GFX were particularly nice. It reminded me of some other cool things.
I am a long time user of Awesome WM as my window manager. However we had a major version bump (3.5 -> 4.1) from the ports today and my configuration disintegrated like a mellowcake that just found itself teleported into the twenty-fourth dimension. This is a recurring problem with this window manager, their API is as much stable as a node.js developer under influence on St Patrick’s day. Now if you are using the default configuration you’ll be fine. But if your configuration is heavily customized, man, you are in for a ride!
Thankfully FreeBSD port maintainers being the good guys that they are, it is still possible to install the older version from the x11-wm/awesome3 port. This will remove x11-wm/awesome-vicious though. But if you ever need to install lib-vicious for Awesome3, I archived my own version here. This also comes with patches for some widgets on FreeBSD which I have been too lazy to report (my bad).
Now I am not yet entirely sure if I will stay on Awesome3 for a while, upgrade to Awesome4 eventually, switch to i3 or xmonad. Well, we’ll see about that.
If you have grown accustomed to FreeBSD administration, you’ve probably learned that users need to be member of the wheel group to be able to use the su command. Some in the land of GNU don’t agree so much with this way of doing and firmly believe that wheel is an instrument of power (which is true in a literal sens) but that’s another story.
In fact I am perfectly fine with this save for one little detail. By default most log files are owned by root:wheel. Altough while some of them have permission 600, a lot of them are 640 which means that members of the wheel group will be able to read them. We have basically two solutions to fix this:
/etc/newsyslog.conf.wheel for the su command.Fixing newsyslog.conf is quite easy, just replace the mode column with any permission you fancy (in our case 600). Don’t forget to restart newsyslog and fix existing permissions with find /var/log -type f -exec chmod 600 {} \;.
However that might not be enough. You see on most BSD wheel has gid 0, whereas on Linux it is root that has gid 0. Nobody is supposed to be a member of root, but it serves as a general purpose group for anything owned solely by root. As such you can often use chown 0:0 as a synonym of owned by root.
But root:root on Linux would not have the same meaning as root:wheel on BSD. In particular you can generally suppose that files owned by root:root with permission 640 on Linux are only readable by the root user but the same supposition doesn’t translate so well for us BSD users.
While I’m not keen of importing such kind of Linuxism into FreeBSD, one way to deal with it would be to use another group for su users. For this we would:
su system group.wheel to this group./etc/pam.d/su to use group=su instead of group=wheel.
Now I don’t personally do that, but I guess what you do it’s your business.
<INSERT APPROPRIATE QUOTE HERE>
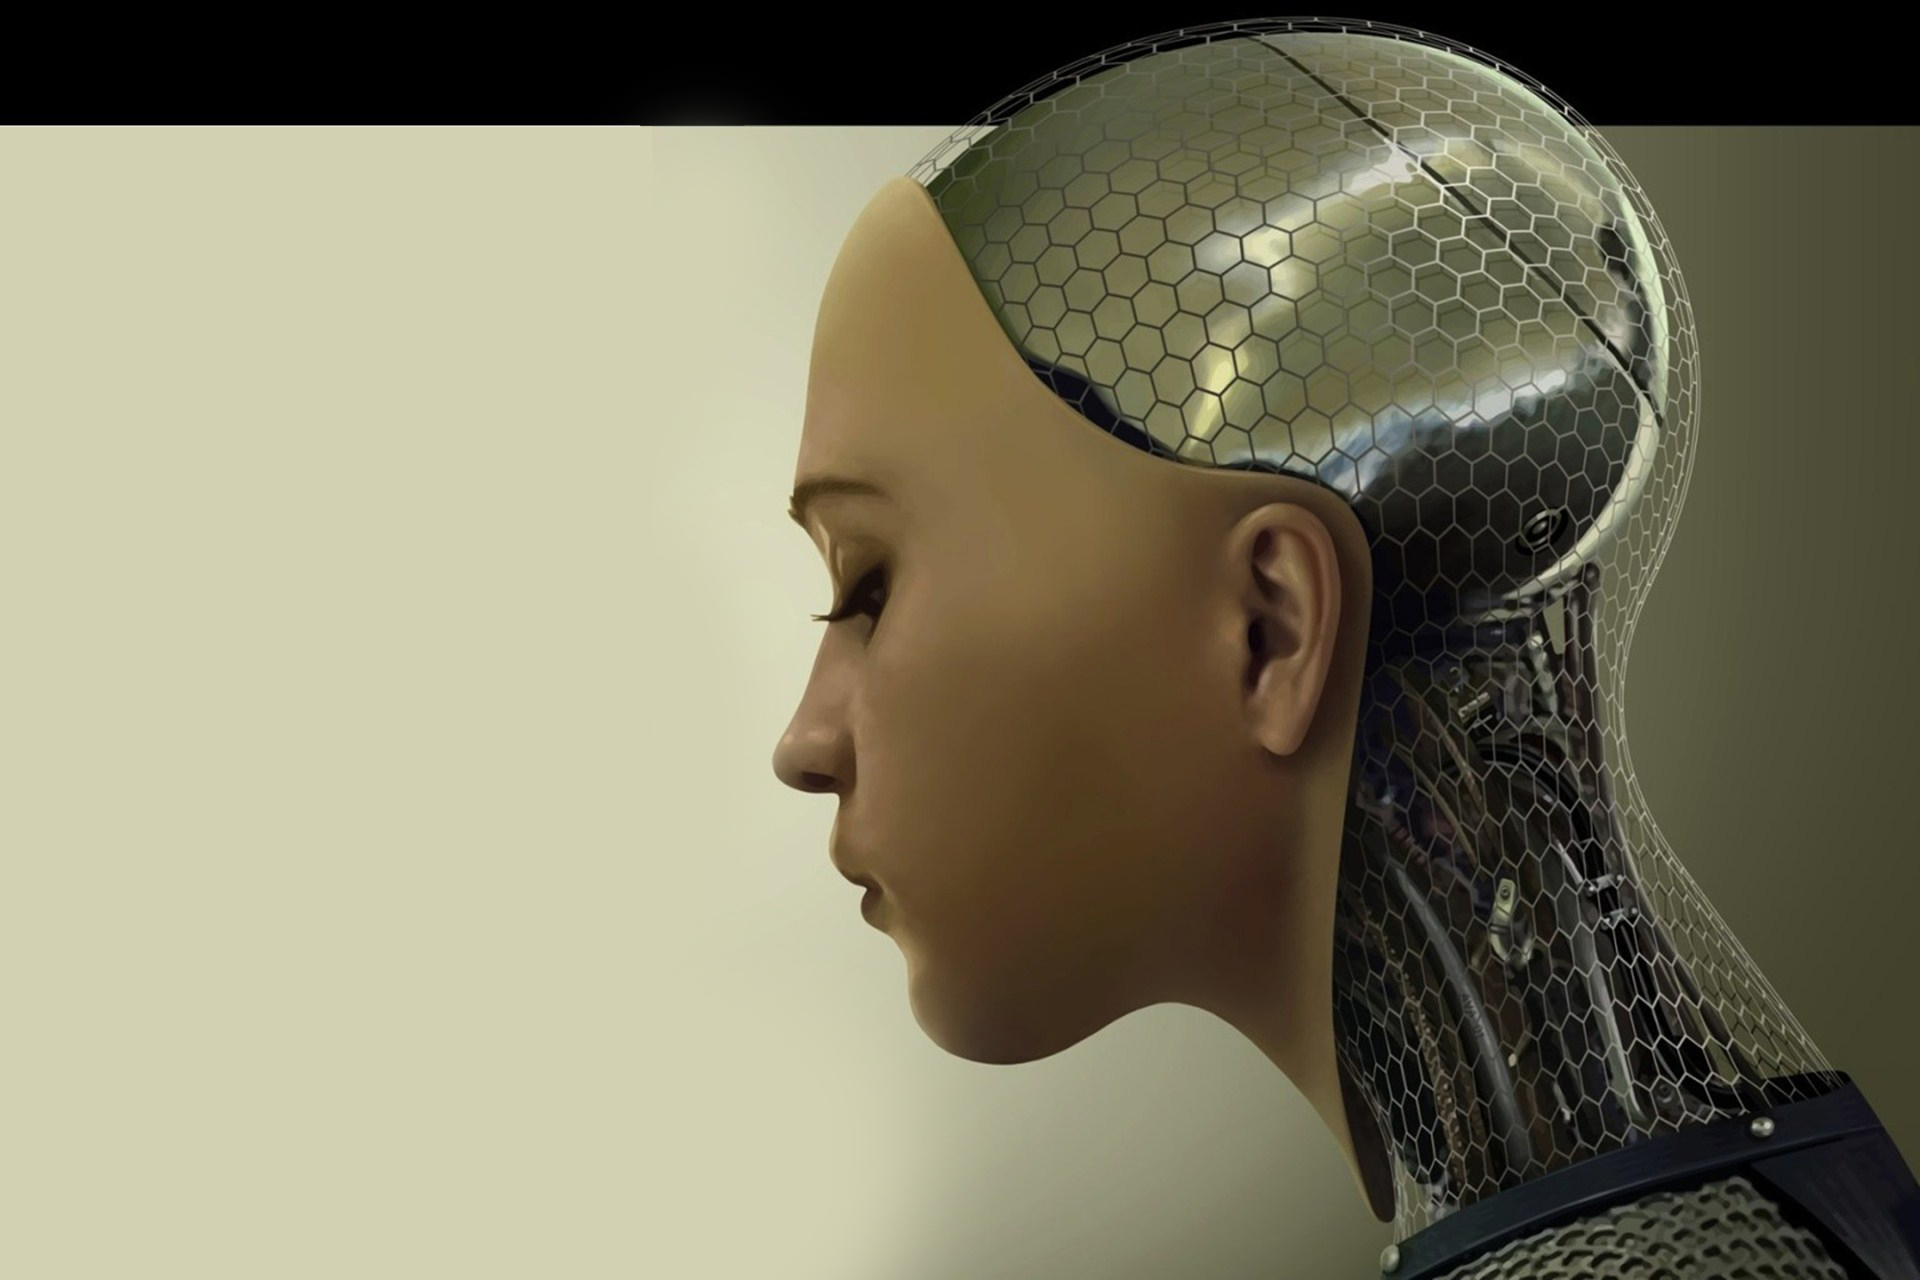
This movie by Alex Garland was on my watchlist since quite some time. Bring together AI, consciousness, existentialism, deal with the singularity and stuff and you got me talking. There are so many ways that such a movie can go wrong. But that’s not a problem here. The narrative is well thought, and it gets to the point. The movie is also honest with itself. But that’s about just that. In the end there is nothing new to learn, no door opened on further reflection and this is what bugged us.
Spoiler alert! Warning! Spoiler ahead!
I guess there are several possible readings. But if you think it revolved around a robot passing the Turing test, my two cents are that you are probably wrong. Instead the whole purpose wasn’t a test of Ava’s ability to fake human behavior and consciousness as she could probably pass this test with ease (as did her preceding iterations), but whether an average human (Caleb) was still capable of seeing her as just a machine or at least not human. And obviously that test has failed.
My other guess is that Nathan, beside being a total drunk twat hypocritical misogynistic asshole, is actually on our side. This guy is genuinely scared by the consequences that a singularity just round the corner will have on humanity (beyond all ethical concerns). So his purpose was not to create the first human-like AI, but to get one step ahead and limit the damage. He wanted to draw the blurry line that would separate machines from humanity so that he could let those machines exist (which he sees as inevitable), but at the same time ensure that humanity thrives and stays true to itself.
Now being a smart guy, Nathan was capable of this assumption. Also forcing himself to make this distinction had a very negative impact on his personality (probably turning him into the boozer and asshole that he is). But he was truly aware of that which is why he designed Ava with such apparent robotic features and why he needed an external human factor (Caleb) to continue his tests.
OK so after some more explanations by Alex Garland that’s probably not what he meant at all. Instead it really is just a test of how smart she is and will she escape. But I tend to disagree, but that’s just my opinion.
Suicide-burn is how I land people on the moon.
On the nose aerobraking is how I bring them back.
Debian stretch is out, a lot of obsolete packages, a lot of major upgrades, which all in all resulted in quite a painful transition the last few days. But I’ll tell you more about that in the following posts.
I don’t really spend much time on Linux nowadays so KDE (along with KDM) has always been my goto solution for a jack all trade no-BS works-out-of-the-box desktop environment. And it worked like that just fine, until… well you know how software goes. KDE has been upgraded, KDM has been depreciated and replaced with SDDM.
I also use xsession so that I have a common way of starting session scripts and daemons (such as this one) and configuring stuff across different desktops. I generally selected custom session in the display manager and that was it. But SDDM does not seem to provide a way to do so, or at least that’s not so clear.
By default, it will execute /etc/sddm/xsession which itself sources /etc/X11/Xsession to which it will pass as argument the value of the Exec line in the desktop file (located in /usr/share/xsessions) describing the currently selected session.
If we want to bypass this, we need to scrap the argument passed to /etc/X11/Xsession no matter what SDDM thinks the current session should be. To do so create a wrapper for Xsession in /etc/X11/user-Xsession:
#!/bin/sh

export PATH=/bin:/usr/bin:/usr/local/bin:/sbin:/usr/sbin:/usr/local/sbin

# Discard argument, we don't care about selecting the desktop environment.
/etc/X11/Xsession
And now configure SDDM to use this instead of its own version of it, in /etc/sddm.conf:
[X11]
SessionCommand=/etc/X11/user-Xsession
If you were trying to compile a Contiki application that targets an MSP430 platform (T-Mote Sky for example) on FreeBSD, you might have noticed that msp430-gcc was removed from the port tree and replaced by gcc-msp430-ti-toolchain. Contiki does not support this newer toolchain so you might find yourself a bit stuck there.
Fortunately you can still access the last version of the msp430-gcc packages from the FreeBSD archives:
Why is it even so hard to reach escape velocity?
How do we fill the interstellar space between sterile worlds?
How do we cope with an ever expanding universe,
red-shifted galaxies fading away in loneliness,
while we wave our hands one last time to those billions of giants?