
Support FreeBSD!
Aside
Reply


Blade Runner, without Vangelis, without Harrison Ford, without that much subtlety, but for a twist. It was cool for sure, yet we didn’t go anywhere near the Tannhäuser Gate. But here to comfort you is Edward James Olmos making a paper-sheep, just in case you didn’t know what you were into.

Those kind of self references are numerous, so far to border on gratuitous fanservice. Still the movie is beautiful, and definitely trying to tell us something, but never gives us the opportunity to position ourselves in regard to its message.
Tiling window managers are cool but there are times when all you want is quick access to a terminal that you can toggle when needs be, so you can either do simple calculation, start jobs, open files or satisfy your weird Unix fetish through convoluted piping to dubious file descriptors, all that from the comfort of your own cozy shell interpreter.
Well if that applies to you i3 user then search no more because I may have got just what you need!
I’ve written a drop-down quake-like terminal for i3, i3-QuakeTerm, inspired by a similar drop-down terminal I did for AwesomeWM and i3-quickterm another similar terminal for i3. The later did not work for me because of a bug in i3ipc-python that was just fixed recently. So I implemented my own version as a workaround.
There are some notable differences however. First everything can be done from the command line, so there is no need for any configuration file. But it is still possible to register multiple drop-down terminal types by providing a different name to each one of them.
It also uses WM_CLASS instance attribute instead of i3’s mark to identify the terminal. As a result you can access the terminal window and control it early from i3’s configuration. Finally the terminal is created with a fork instead of in-place starting. That means that you can use any kind of graphical command as the terminal, even if it doesn’t start any shell or command itself, as long as you can use or modify its name as an unique identifier.
More info on the github page.
My desktop is not awesome anymore, but it is full of high trees.
In a preceding post I complained about Awesome’s inconstant API and concluded that I would probably switch in the near future which I finally did last week. That’s right, I finally ditched AwesomeWM for i3, and so far not disappointed at all.
In overall the configuration is a lot easier with i3 than it is on Awesome. Sure you cannot play as much as you used to with lua, but the syntax of the configuration file is rich enough that you don’t need much scripting anyway. It’s very Unixy, simple in its core and delegates itself nicely to external tools (i3bar, i3status) and scripts. There is a very nice IPC mechanism (that goes through a Unix socket) that you can use from command line or librairies in C, Python, OCaml and many others.
Now there is no fancy widget as you do have in Awesome, everything is text + UTF8 with some coloring. Perhaps there is an i3bar alternative that can do more than this but I don’t know of any yet. Workspaces are also different, they are shared between outputs and not visible in i3bar until focused or contain a window, but in time you get used to it. Although there is nothing that I really miss from Awesome, also the simple API, simple configuration, nice documentation, clean IPC via Unix socket (which is really nice, you can communicate with i3 from virtually anywhere, even assembly), all of those were really worth the change.
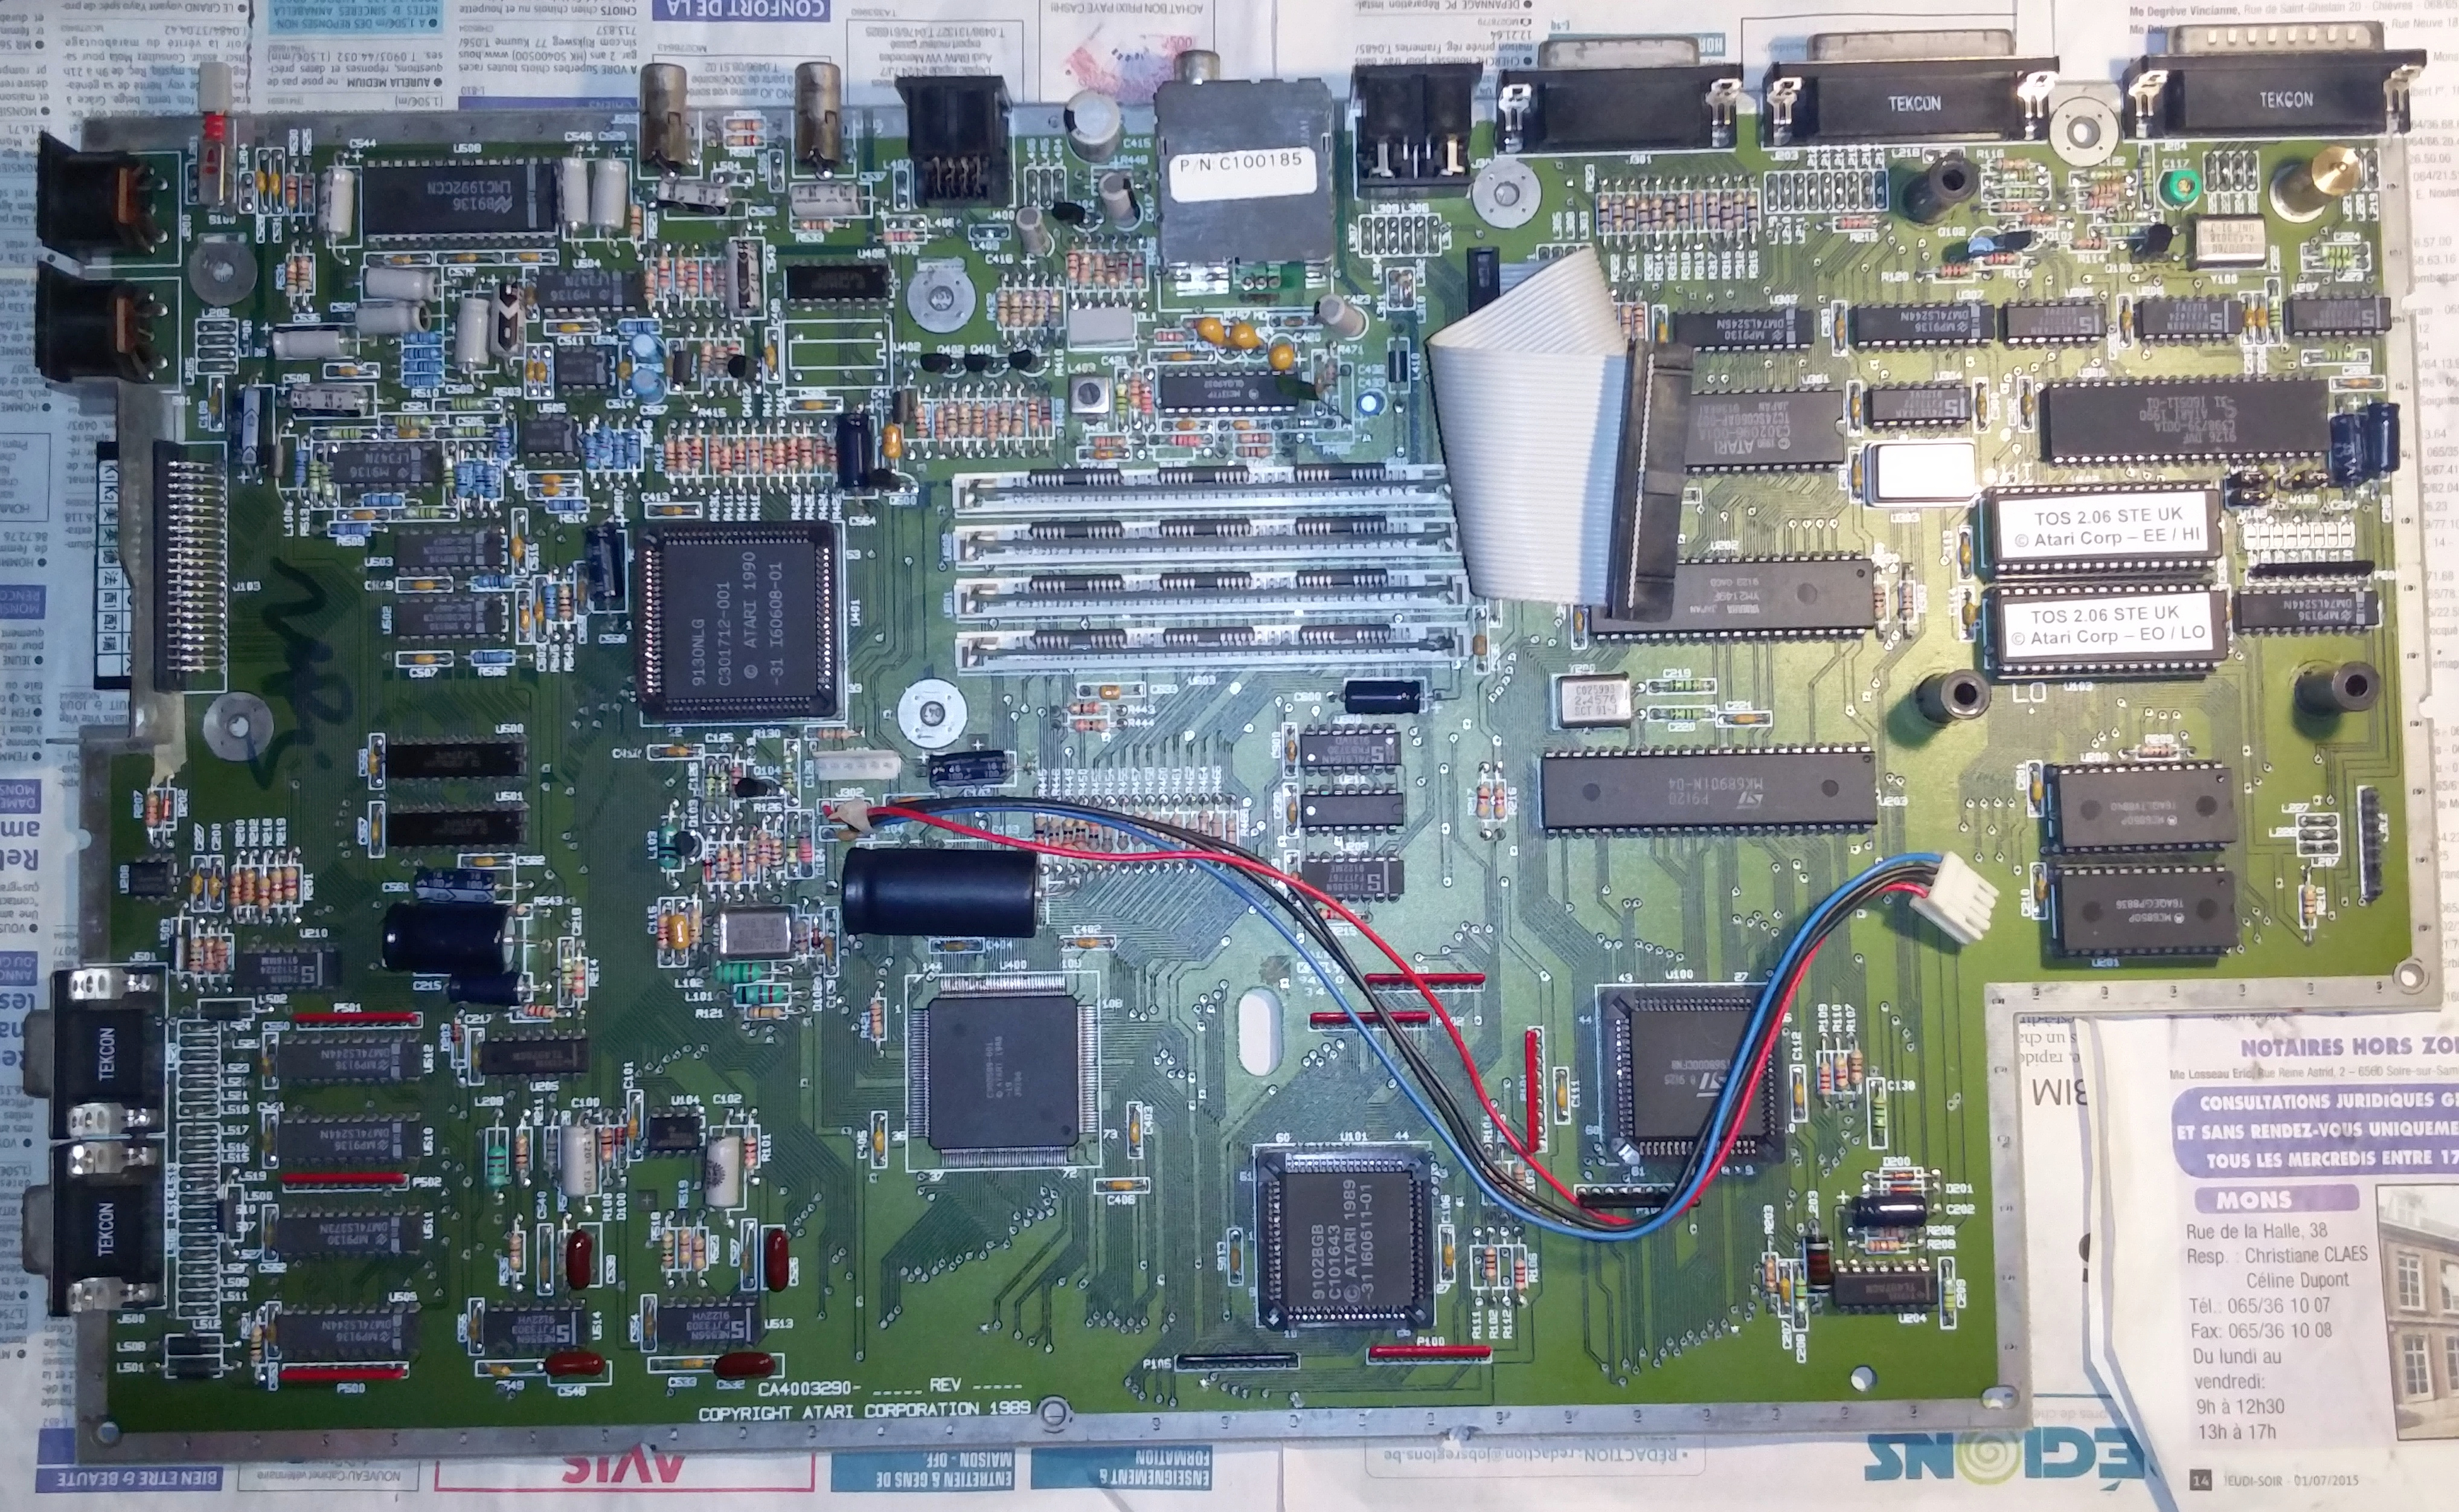
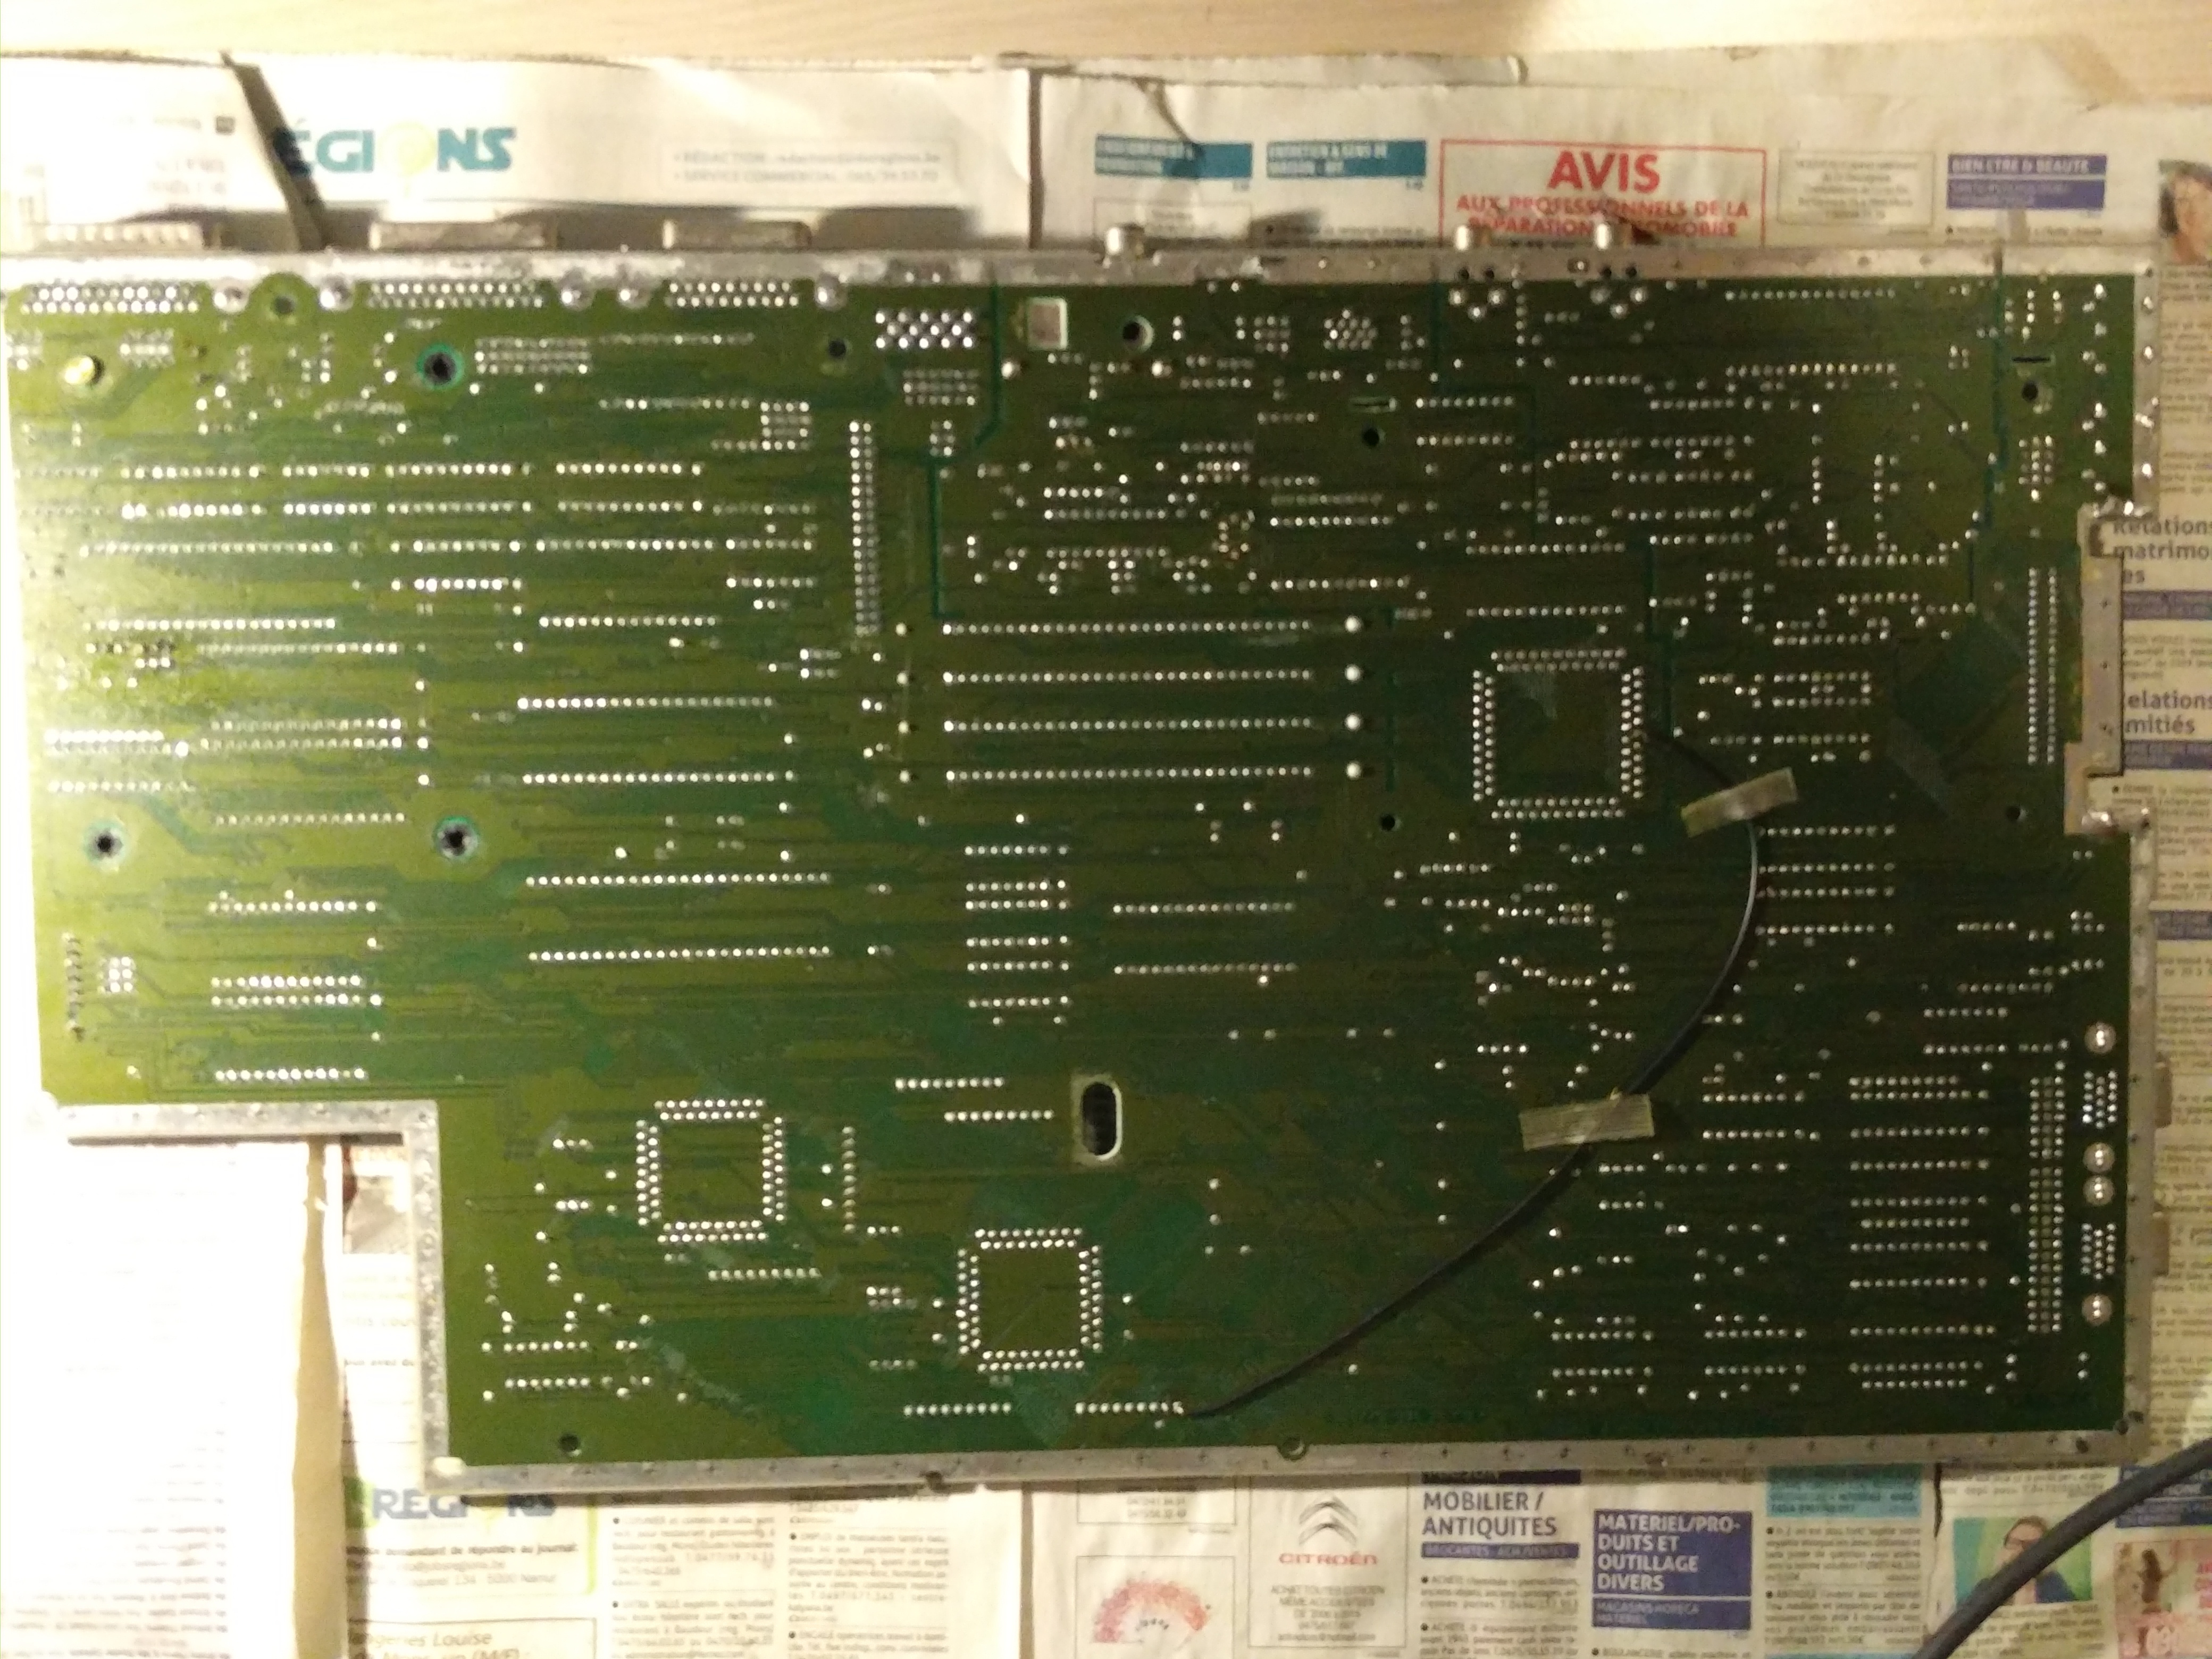
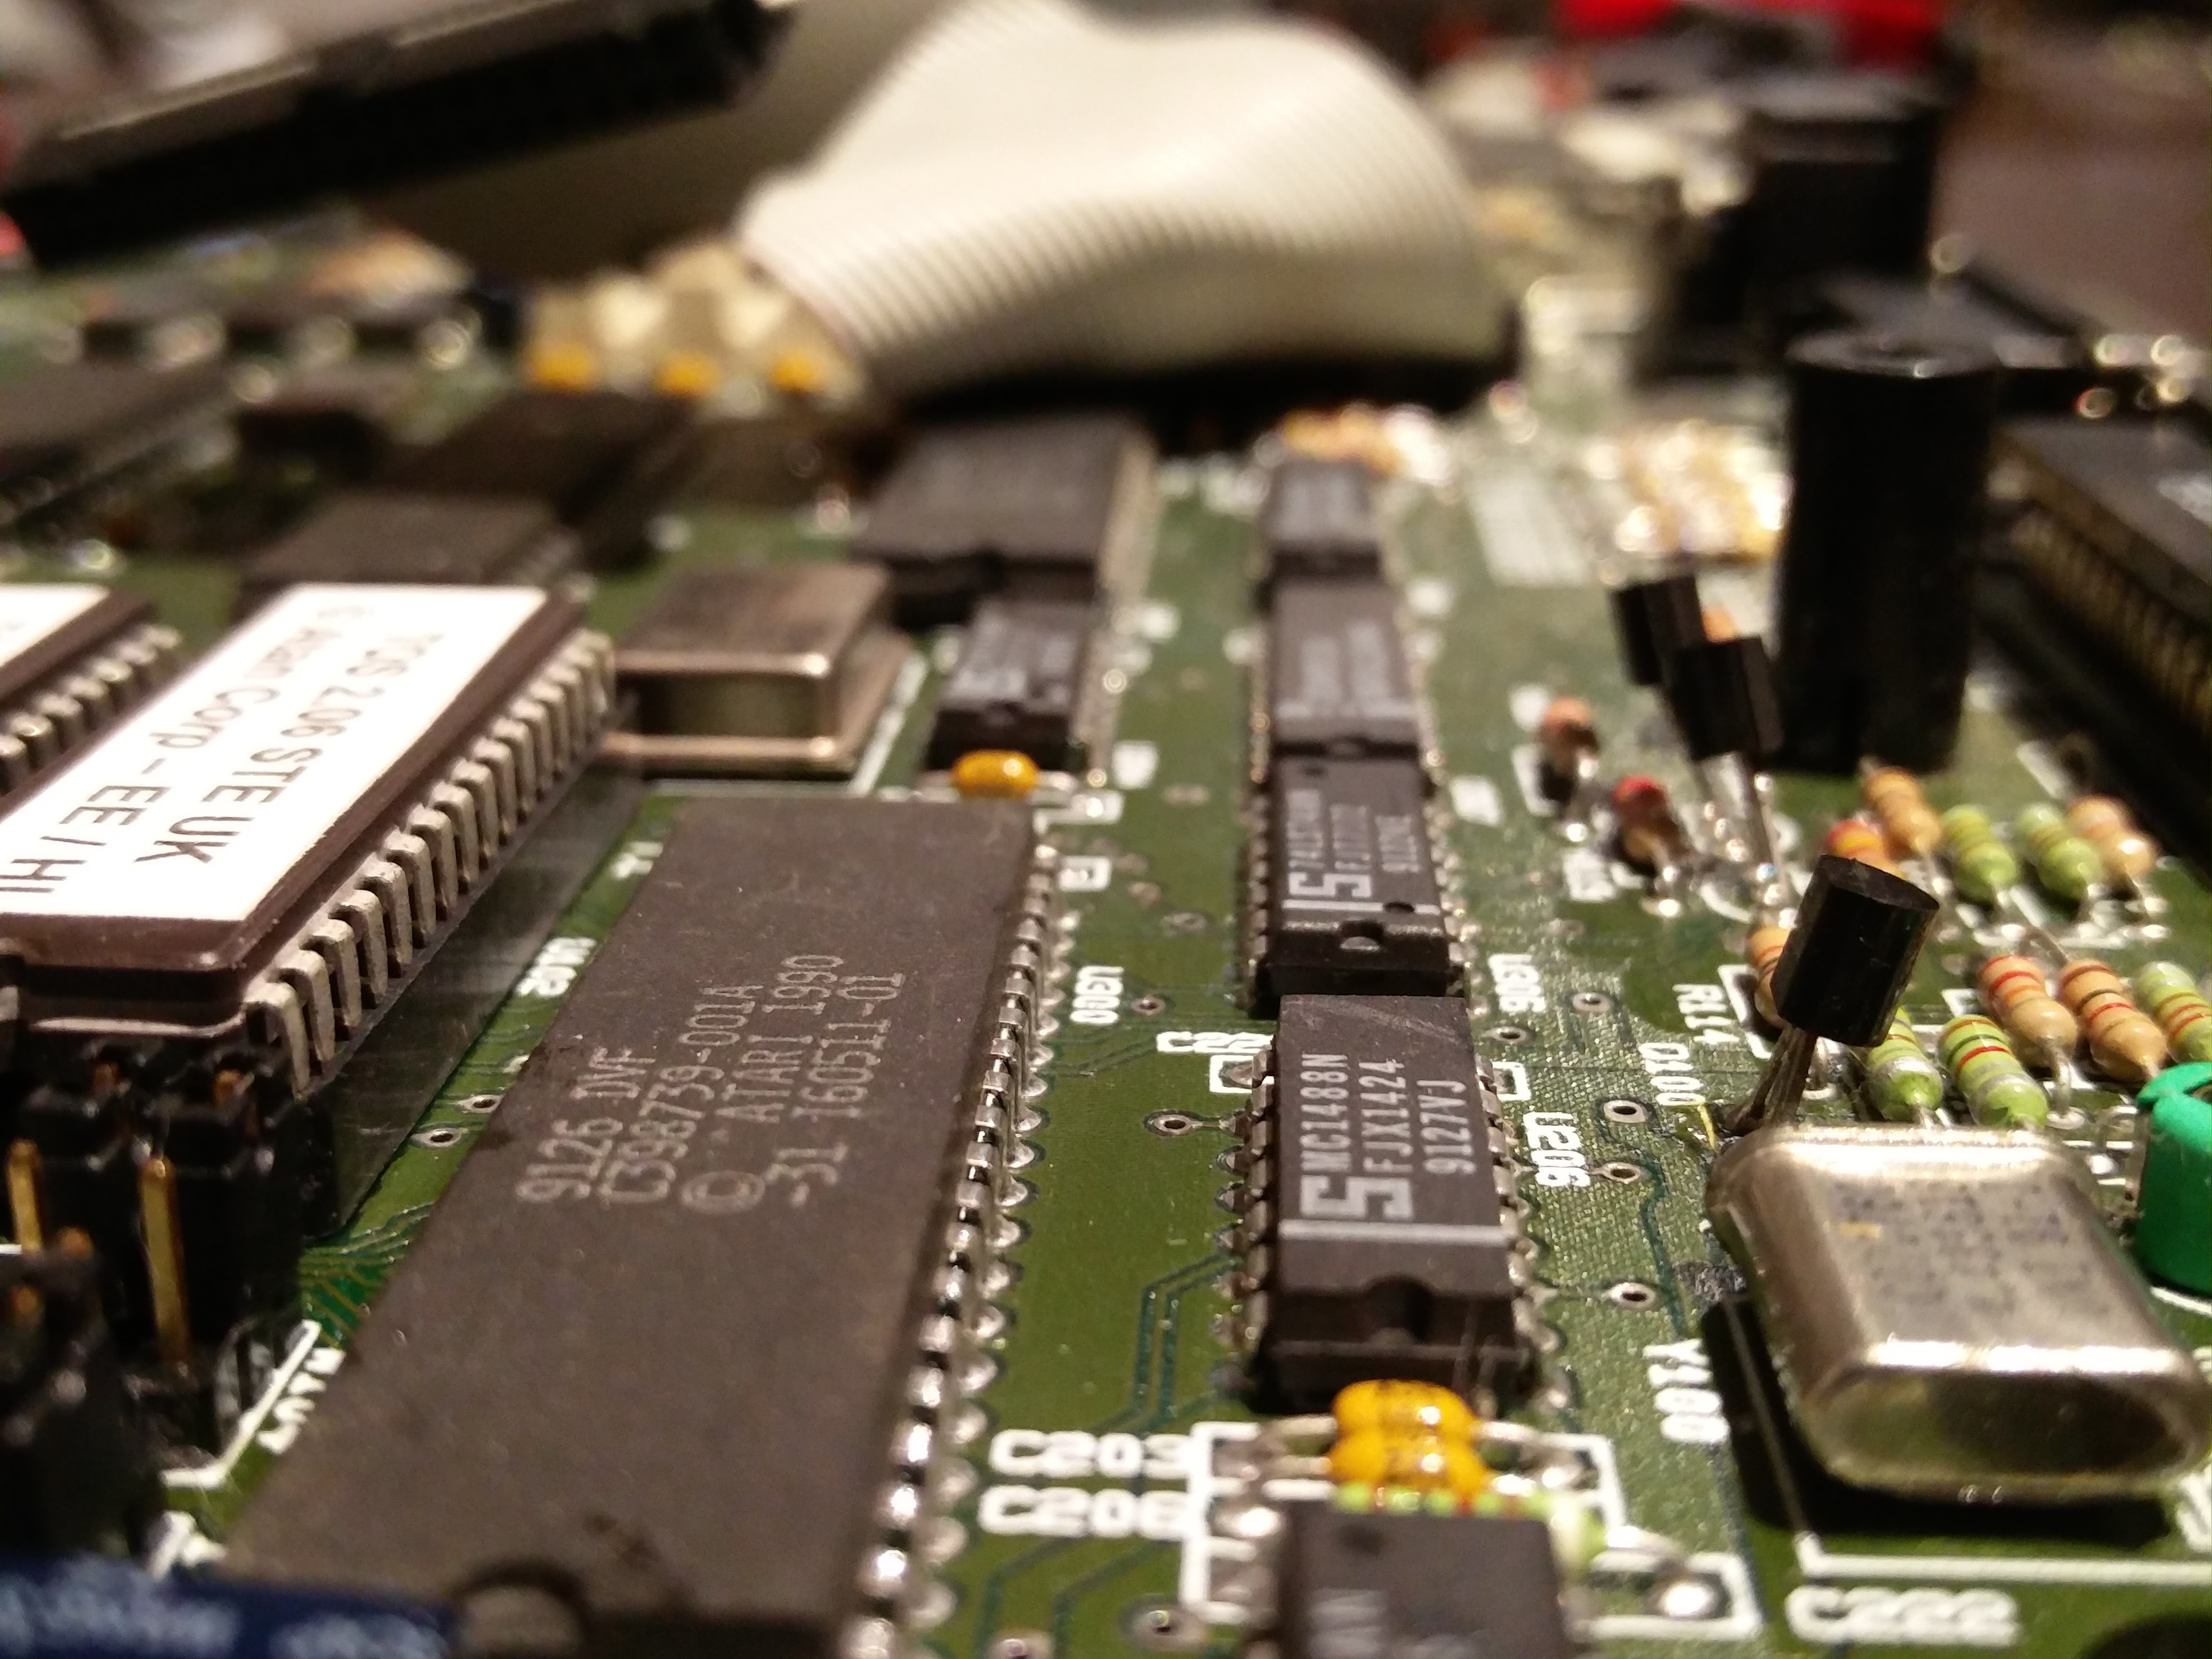 Had to do some soldering on my Atari recently, so I took the opportunity to take some photos of the mainboard (from both sides since I also had to desolder and replace some components). Not that it’s that much hard to find on the Internet, but here’s my two cents. It’s a 1040STE, however I took the photos with my phone so it’s not the best quality:
Also if you want more info about STE hardware I highly recommend this site.


We are but simple travelers who seek the enchanter who lives beyond these woods.
Now if you think that’s a rip off of Mass Effect, you are wrong! Stop playing video games and go read your classics. Now if you think you are going to see an adventure of Valérian and Laureline, you are wrong! It’s heavily inspired but it’s nothing like it, and it’s something in its own right. Valérian is not that clumpsy hero of the equinox, a brave knight despite himself. Laureline is gratuitously aggressive (so much that it gets kind of scary). The Shingouz are not as dubious as they ought to be. The grumpy transmuter is not grumpy at all (they don’t even come from Bluxte, but they sure are rare), and except for the apparence they are closer to telepathic Spiglics than anything else. And for god sake, in this movie Point Central is the ISS!

M. Bison little known brother, he’s the one who made it in the family.
It’s very close to the Ambassador of the Shadows (despite the title), but there are numerous nodes to some of the other albums in the series. The movie is still Valérian and Laureline (also despite the title) their is an unspoken balance about it that is very hard to find nowadays, they are acting as a team, they are each other’s sidekicks, and they are each other’s heroes and that’s incredibly refreshing.
It’s also very simple. You shouldn’t expect the need to turn your brain on for two hours. But I’m not sure you should expect anything else. Would it have been more faithful, it wouldn’t have been enough. Would it have been less faithful, it wouldn’t have been worth the name. And this movie tries hard to do just that by placing itself right in the middle. So in the end it’s a pleasant and visually stunning space adventure among the riches of cosmos.

In a previous post, I explained how a disk failure prompted me to build that NAS I’ve dreamed of for years. That happened months ago, but in the meantime we’ve been reviewing mainboards, CPU specs, reading other configurations over and over again. We finally settled on a setup of our own.
We did so with a set of constraints. First anything with less than 4 HDD was out of the question. You need at least 3 HDD for RAID5, 4 for RAID6, with RAID1 (mirroring) and only 2 HDD you would waste half of your total disk space, and RAID0 (no redundancy) would be completely insane, disk failures do happen, believe me! Since we also want to upgrade our setup, we looked for mainboards with at least 6 SATA.
Second, it would run FreeNAS, anything else doesn’t come close. We avoided some component that are known to cause trouble in FreeBSD, mostly some NIC. Although as far as I can remember I didn’t have any problem for a while.
Finally I’ve been a long time advocate of ECC memory for NAS. However ECC memory is expensive and finding cheap and reliable mainboard/CPU that support ECC is difficult. So we relaxed that constraint. But I’d be happy to know about any good alternative.
Our base setup is 12TB HDD / 16GB RAM upgradable to 24TB HDD / 32GB RAM. Total cost was 688€ and 310€ without any HDD. We were lucky enough to receive HDD from different batches even though we bought all of them from the same vendor. Similar HDD would increase the risk of multiple disk failing at the same time (which is a very bad thing for a RAID5 setup).
Now if we could change only one thing, that would be the CM Elite 343 case. While it is possible to mount 6 HDD, their positioning is not optimal and arranging the cables properly was difficult.
The build was relatively straight forward. As I said we had some problem with the CM Elite 343 case. Another problem was the SYS_FAN cable from the case which was too short to reach the MB. We also had some problem with one of the two mainboards which constantly rebooted. We had to reset the CMOS to fix it. But now everything works flawlessly.
I already booted FreeNAS 11, everything seems to be working properly. The idle consumption is 28W, peaks at 60W on boot, but we’ll see about that when the system will be fully installed. The setup is amazingly silent, although the front system fan is not connected for now.
In the next episode I will install and configure FreeNAS on Gandalf (it already has a name). Until then I’m going to fold the gazillion amazon boxes spread all over my apartment.
On FreeBSD we generally use WIDE DHCPv6 (also known as KAME DHCPv6, dhcp6c or simply dhcp6) as DHCPv6 client. However a rare bug can trigger this client to flood the DHCP server with requests. This happened to us and quickly prompted online.net to block our server for outgoing flood. This scared me a bit at first, as I thought we might have been part of a DDoS attack. Thankfully that was not the case.
But we still had to disable dhcp6 (and consequently IPv6). On Linux it is generally recommended to limit the DHCPv6 traffic using iptables rules. However this is not as simple with PF on FreeBSD. You cannot provide a limit on the packet rate per rule. You can limit the connection rate (see max-src-conn-rate), but I’m not sure this could be of any use here. It should be possible to use altq but this is not part of the GENERIC kernel. I really didn’t want to compile a custom kernel just as a workaround.
Instead I used another DHCPv6 client, namely ISC DHCP client (isc-dhcp43-client). Just create /usr/local/etc/dhclient6.conf and configure your DUID:
interface "igb0" {
  send dhcp6.client-id <DUID>;
}
On FreeBSD, isc-dhcp43-client doesn’t come with any rc starting script, so here is one for DHCPv6 (you should place it in /usr/local/etc/rc.d/dhclient6:
#!/bin/sh
#
# PROVIDE: dhclient6
# REQUIRE: DAEMON
# KEYWORD: dhcp
#
# Add the following lines to /etc/rc.conf to enable dhclient6:
#
# dhclient6_enable="YES"
#

. /etc/rc.subr

name="dhclient6"
desc="ISC DHCPv6 client"
rcvar="dhclient6_enable"

start_cmd="dhclient6_start"
stop_cmd="dhclient6_stop"

dhclient6_start()
{
  /usr/local/sbin/dhclient -cf "${dhclient6_conf}" -P -v "${dhclient6_iface}"
}

dhclient6_stop()
{
  if [ -r "${dhclient6_pid}" ]
  then
    kill -- -$(cat "${dhclient6_pid}")
    rm -f "${dhclient6_pid}"
  fi
}

load_rc_config ${name}

: ${dhclient6_enable="NO"}
: ${dhclient6_pid="/var/run/dhclient6.pid"}
: ${dhclient6_conf="/usr/local/etc/dhclient6.conf"}
: ${dhclient6_iface=""}

run_rc_command "$1"
Finally enable this in /etc/rc.conf:
dhclient6_iface="igb0"
dhclient6_enable="YES"
